VPN
The TechFak VPN allows access to the TechFak network on PCs outside of the university. Access to TechFak's internal services is therefore possible from home or on the go.
OpenVPN is used. OpenVPN only uses one UDP (or alternatively TCP) port for communication. This means that the probability that the VPN can be used from networks with restricted Internet access is significantly higher than with an IPSec VPN. In addition, TechFak's OpenVPN service runs on TCP port 443 (HTTPS), which is enabled in almost all firewalls. OpenVPN can also be used if Internet access is only possible via a proxy server.
VPN client software
The OpenVPN client is available for all common operating systems:
- Linux (command line or GUI e.g. via NetworkManager)
- Windows (OpenVPN GUI)
- Apple OS X (OpenVPN client “Tunnelblick”)
- Android (“OpenVPN Connect” app in the Google Play Store)
- iOS (“OpenVPN Connect” app in the Apple App Store)
- other UNIX-like systems (FreeBSD, OpenBSD, etc.)
Authentication
Authentication takes place with the TechFak network password (see account passwords). The username is the TechFak username. The password can be queried with the command tfpasswd net (e.g. on shell.techfak.de or compute)
| Access point/gateway: | openvpn.cit-ec.net |
| Port: | 1194 UDP |
| Alternative port: | 443 TCP |
| Use via HTTPS proxy possible: | yes (TCP) |
| Can be used via Socks proxy: | yes (TCP) |
| Cipher: | AES (AES-CBC) |
| Key length: | 256 bits |
| Hash mechanism: | HA-512 |
| Authentication: | via username and password |
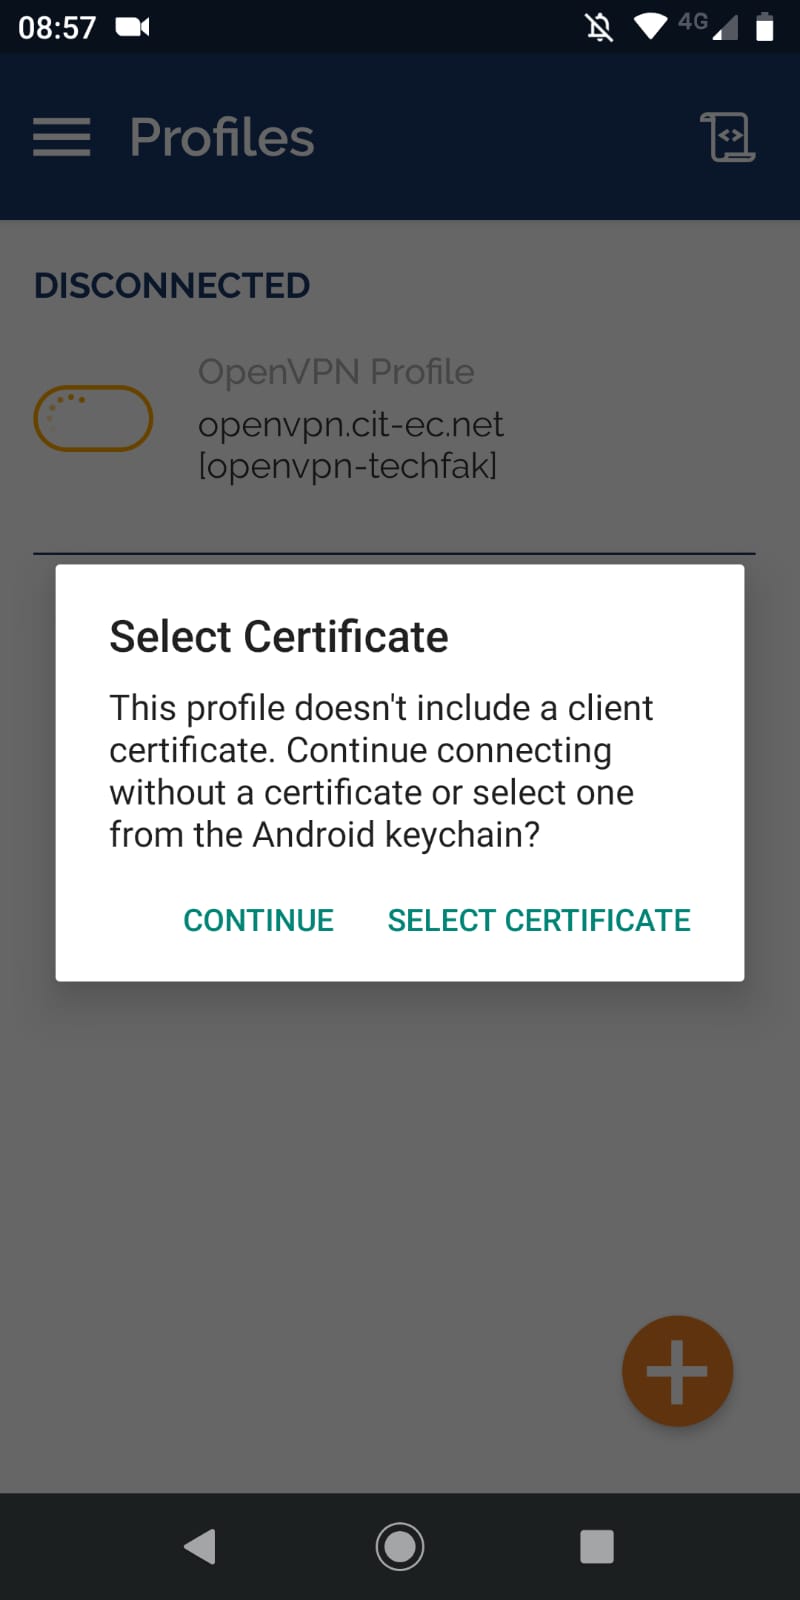
| Client certificate required: | no |
| CA certificate required: | Yes |
| CA certificate: | citec-root-ca.pem |
| Required OpenVPN version: | 2.1 or higher (recommended: from 2.3) |
| Configuration file: | openvpn-techfak.ovpn |
Note
As an alternative to the above configuration file, the following can also be used. A TCP connection is used for the VPN. openvpn-techfak-tcp.ovpn
Setup
This guide is for the current Gnome desktop environment (Ubuntu, Fedora). Windows may appear differently for other desktop managers.
Download the configuration file openvpn-techfak.ovpn.
Go to Network Settings.
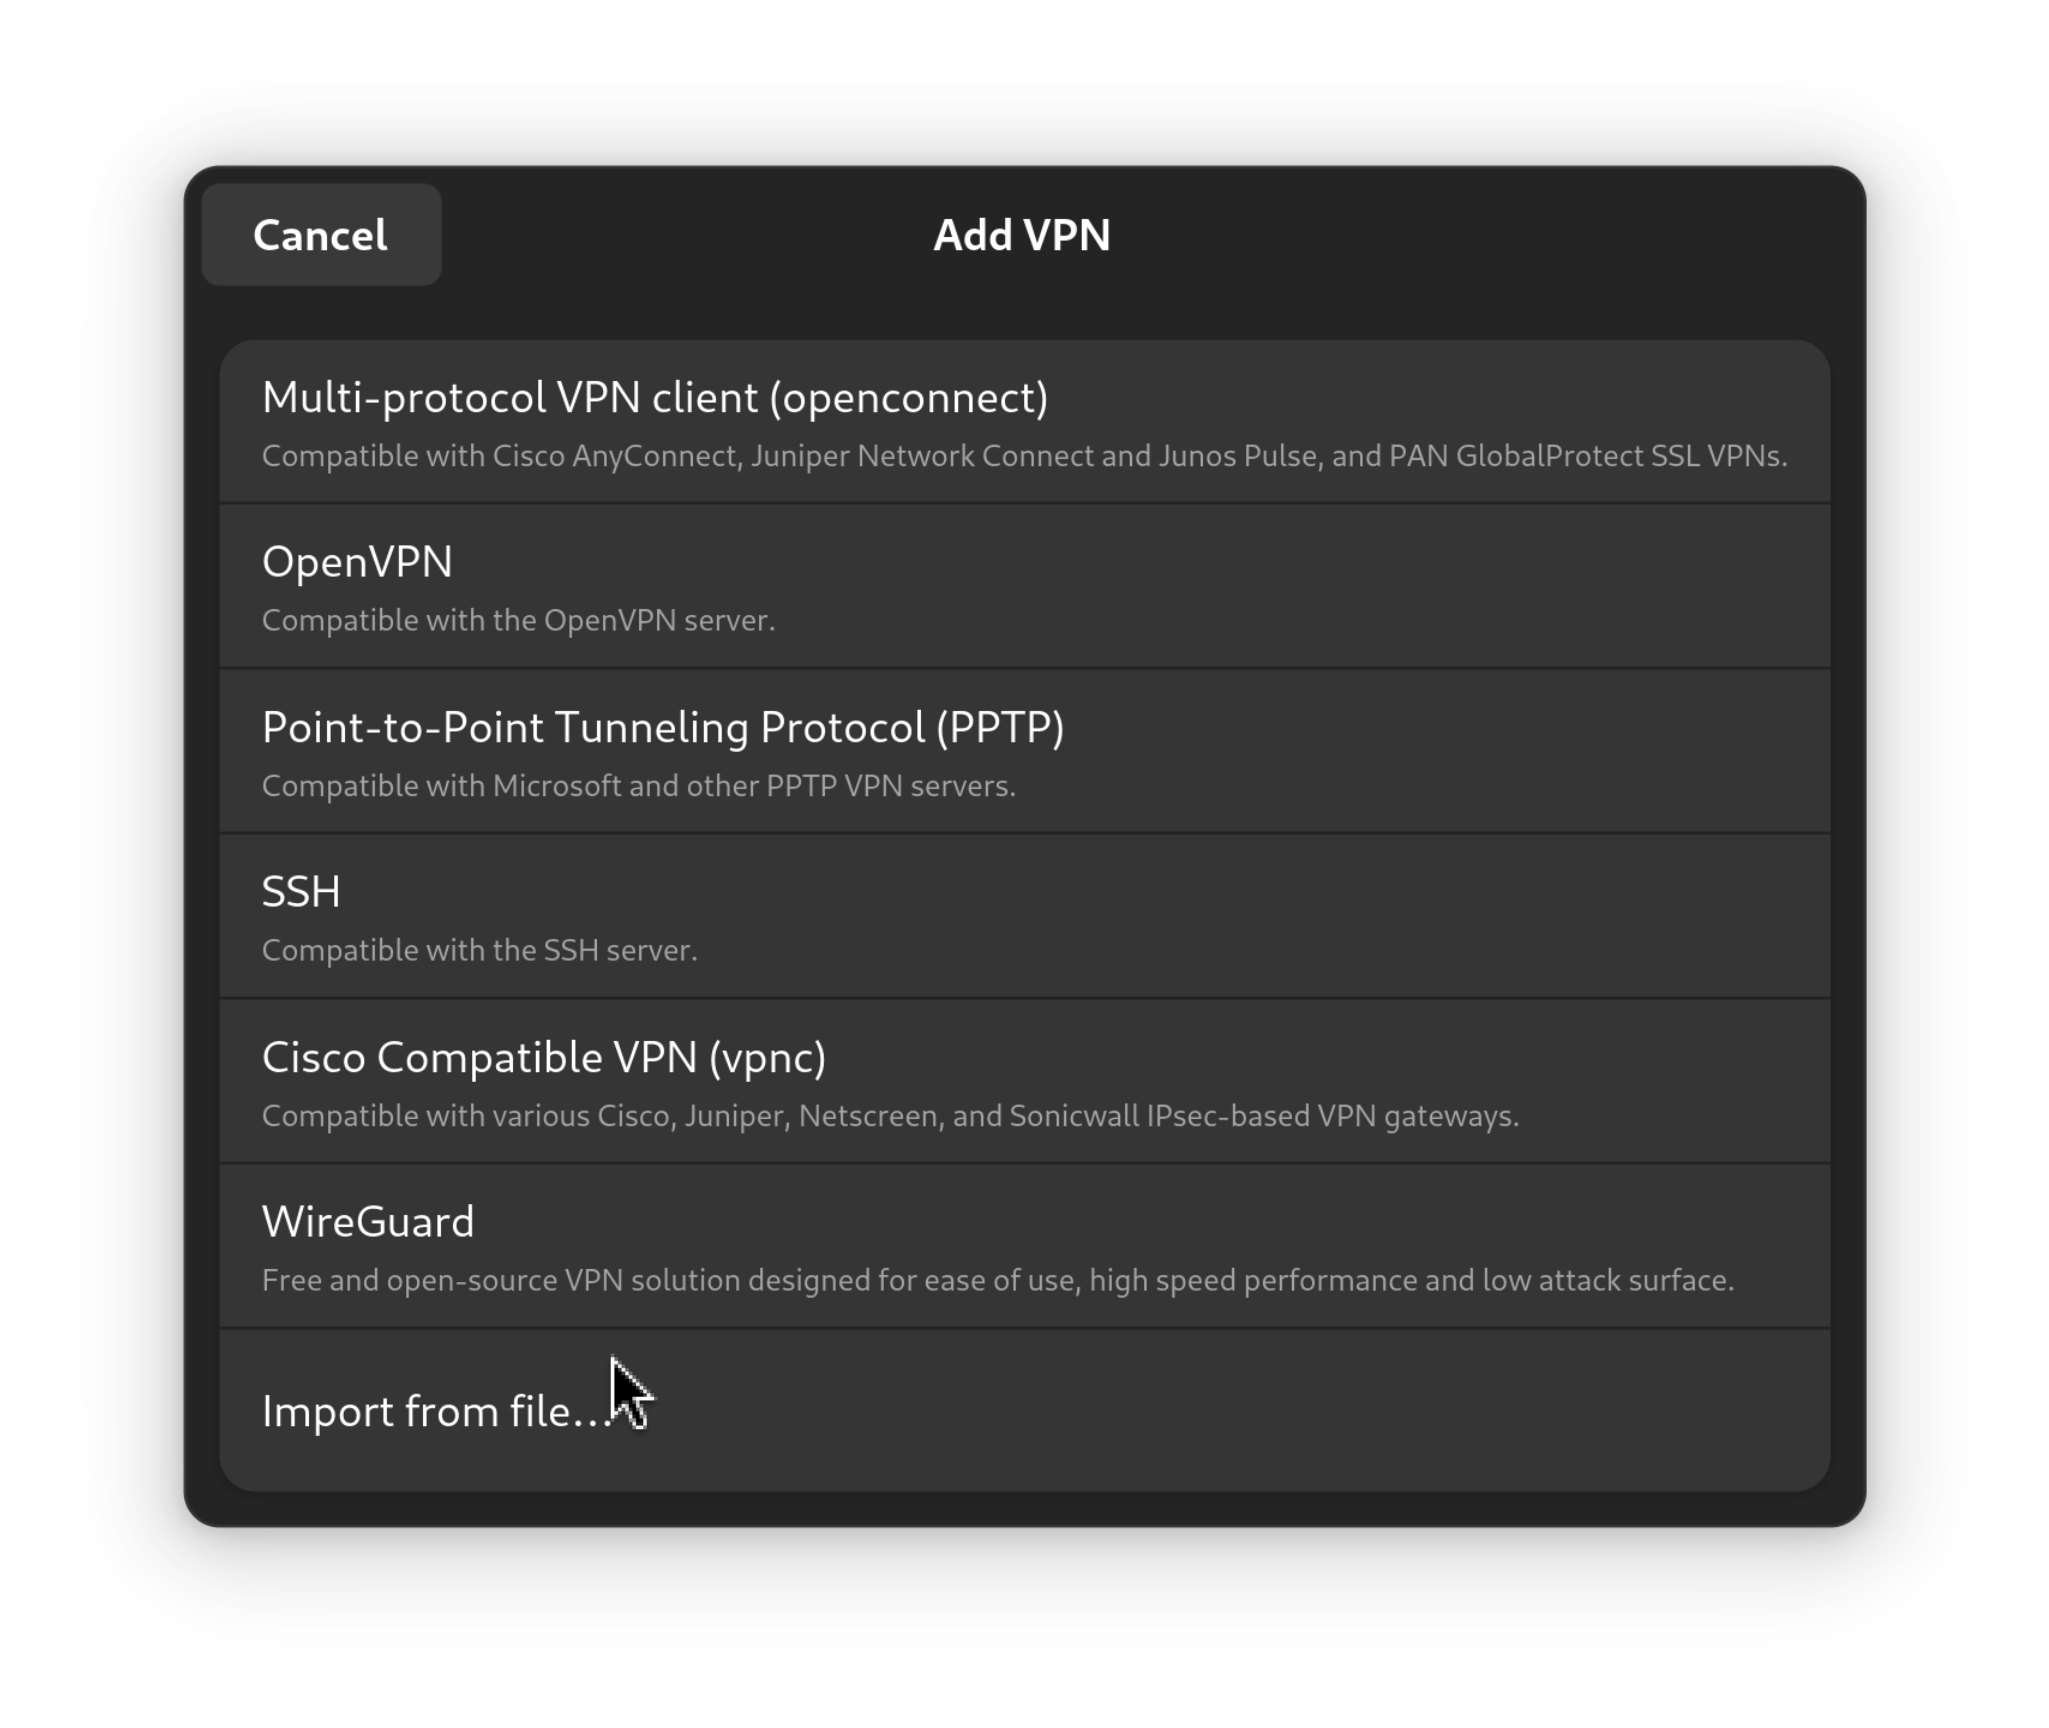
Add new VPN
Select "Import from file..."
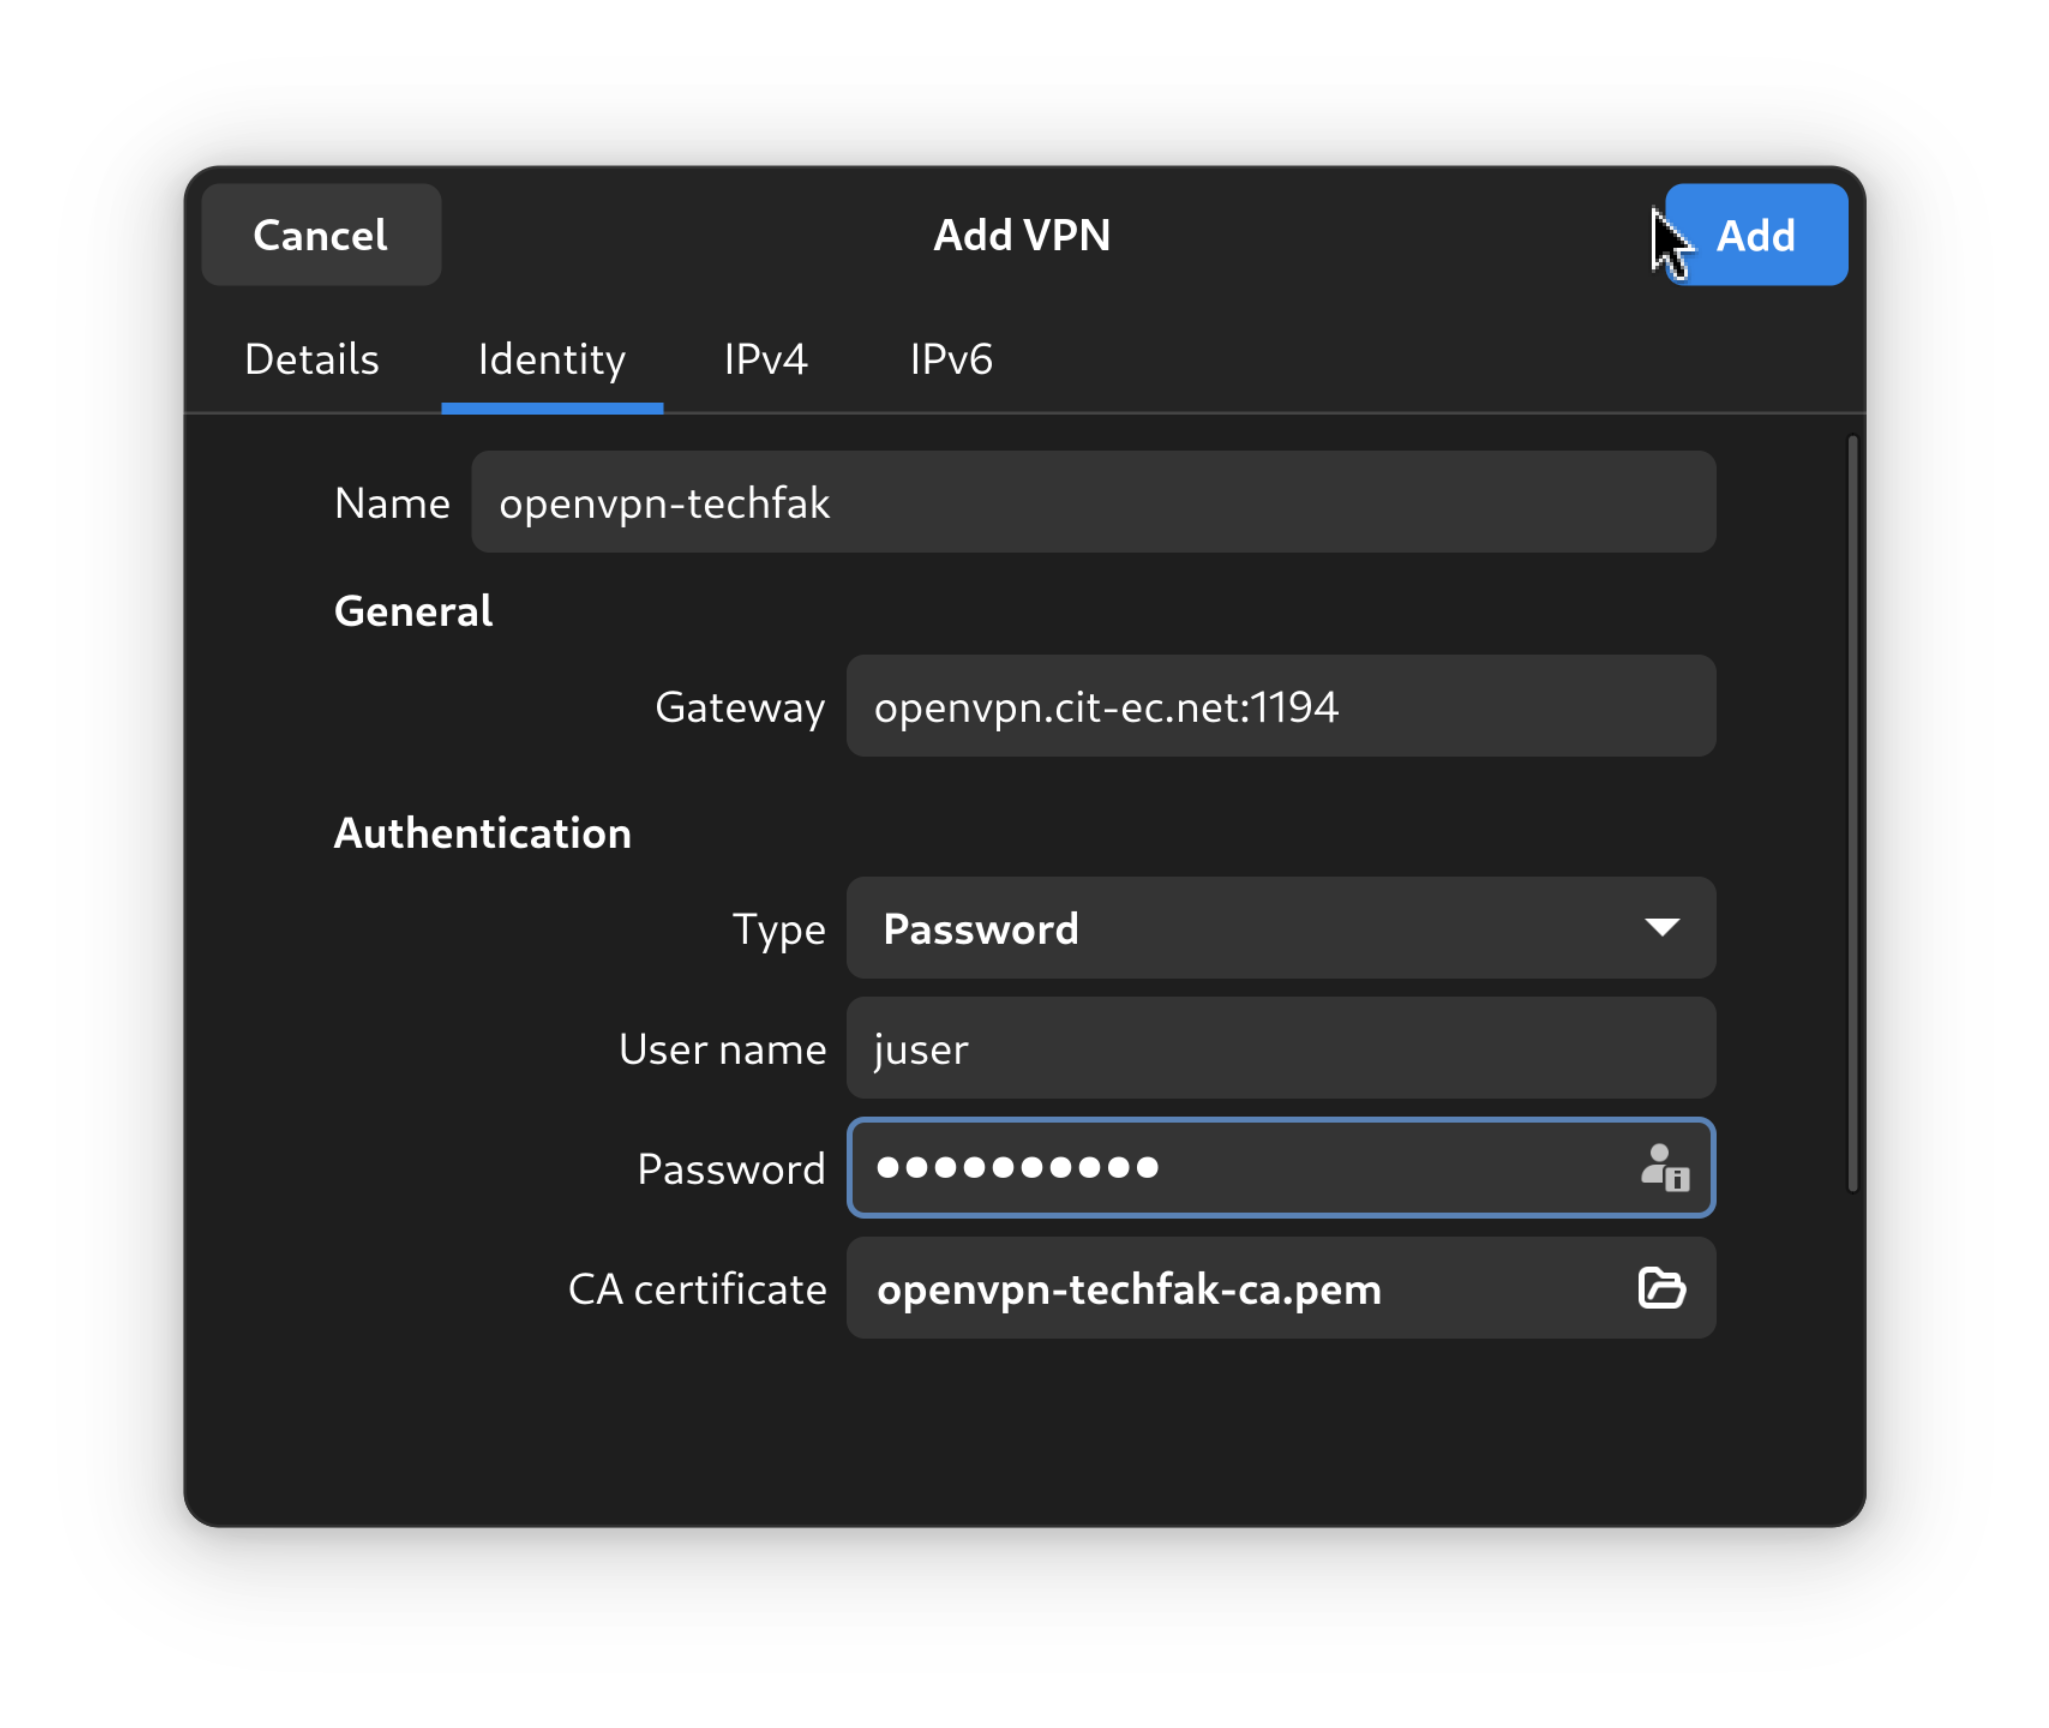
Save and activate the VPN in Network Settings.
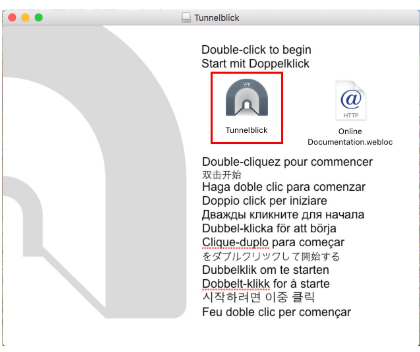
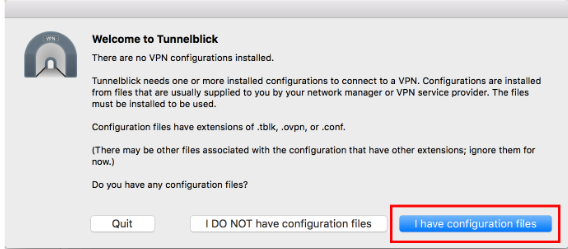
Download the OpenVPN client “Tunnelblick” from https://tunnelblick.net/herunterladen and open the disk image.
Start tunnel vision. Click on “I have configuration files”.
Download the configuration file and open the file with a double click.
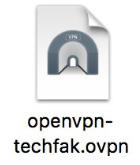
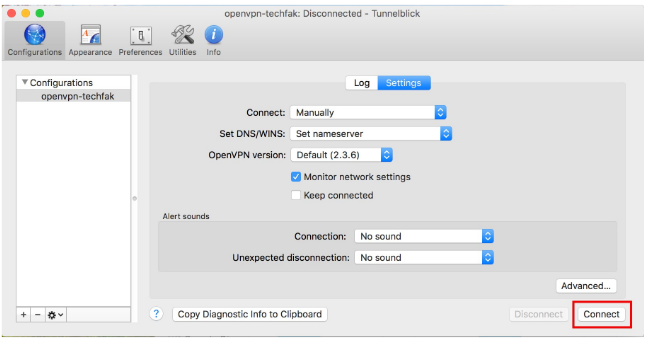
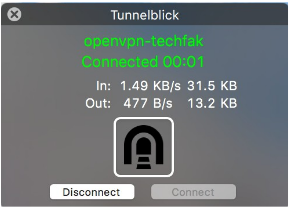
The profile will be loaded automatically. Click on the “Connect” button.
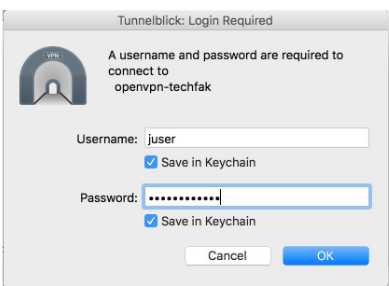
Enter TechFak username and TechFak network password. The access data can optionally be saved.
The connection is established. If successful, “Connected” will be displayed. The OpenVPN application can be closed. The connection continues in the background. Activating and deactivating the connection can now be done using the icon at the top right.
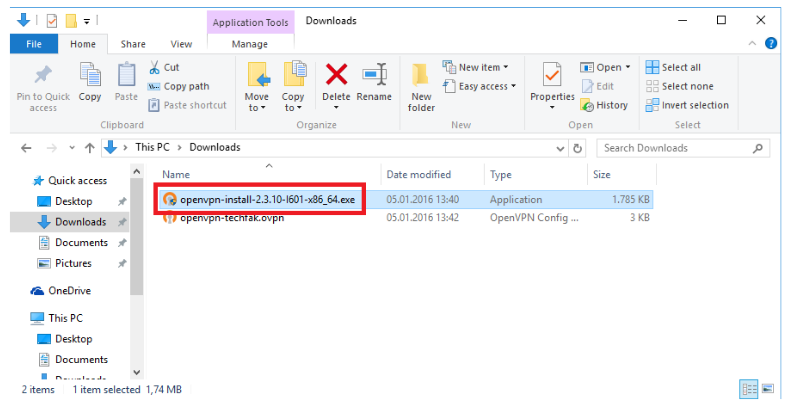
Download OpenVPN from http://openvpn.net (attention: download the version that suits your system!) and start the setup by double-clicking on the installation file.
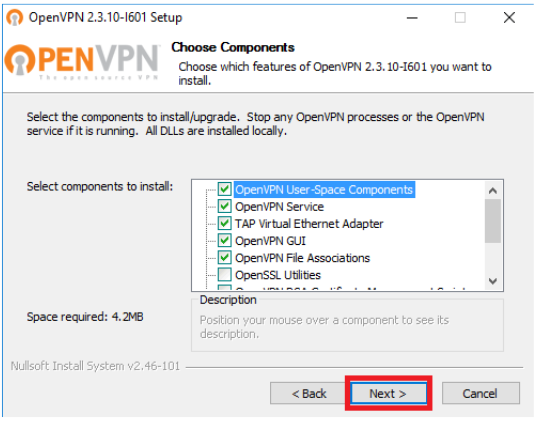
Carry out the installation with the suggested default settings. Important: Do not start OpenVPN yet!
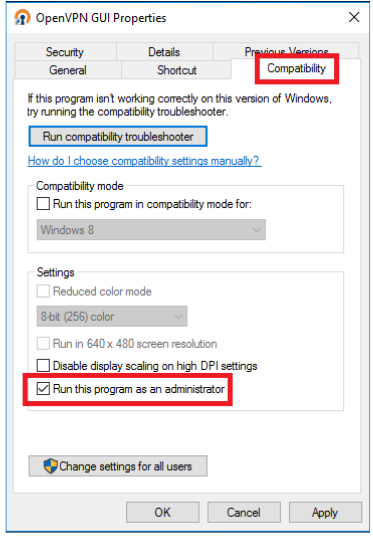
Right-click on the link to open the properties dialog.
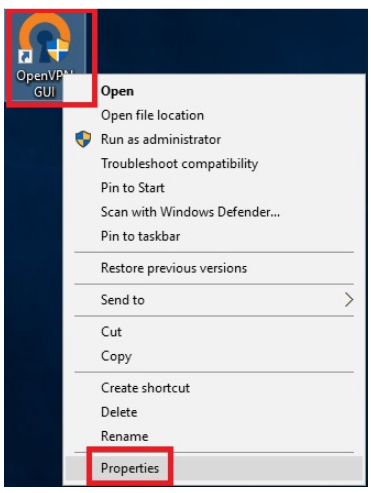
Click on the “Compability” tab and check “Run this program as an administrator”. Start OpenVPN by double-clicking on the shortcut.
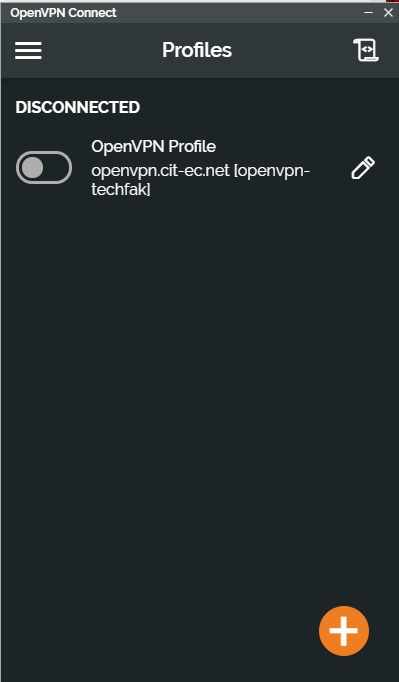
Download the configuration file. Open OpenVPN, click on the “File” tab and drag the configuration file into the field displayed.

Enter your username and password and then click “ADD”.

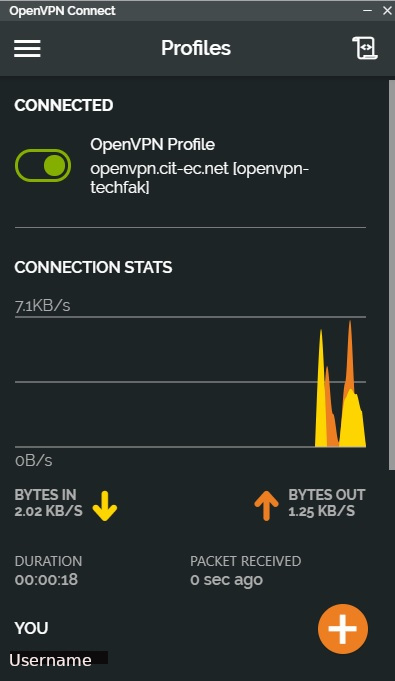
Click on the controller and the connection will be established.
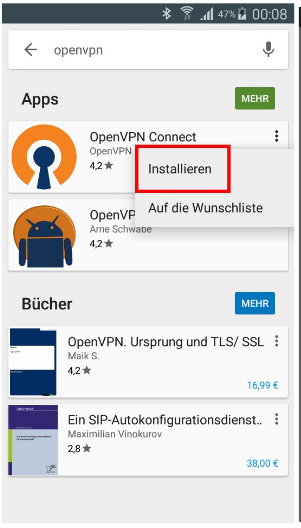
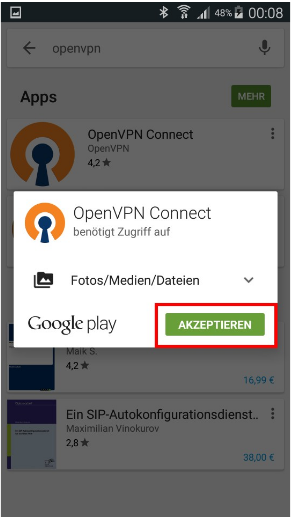
Open the Google Play Store, search for and install the “OpenVPNConnect” app. The app is free.
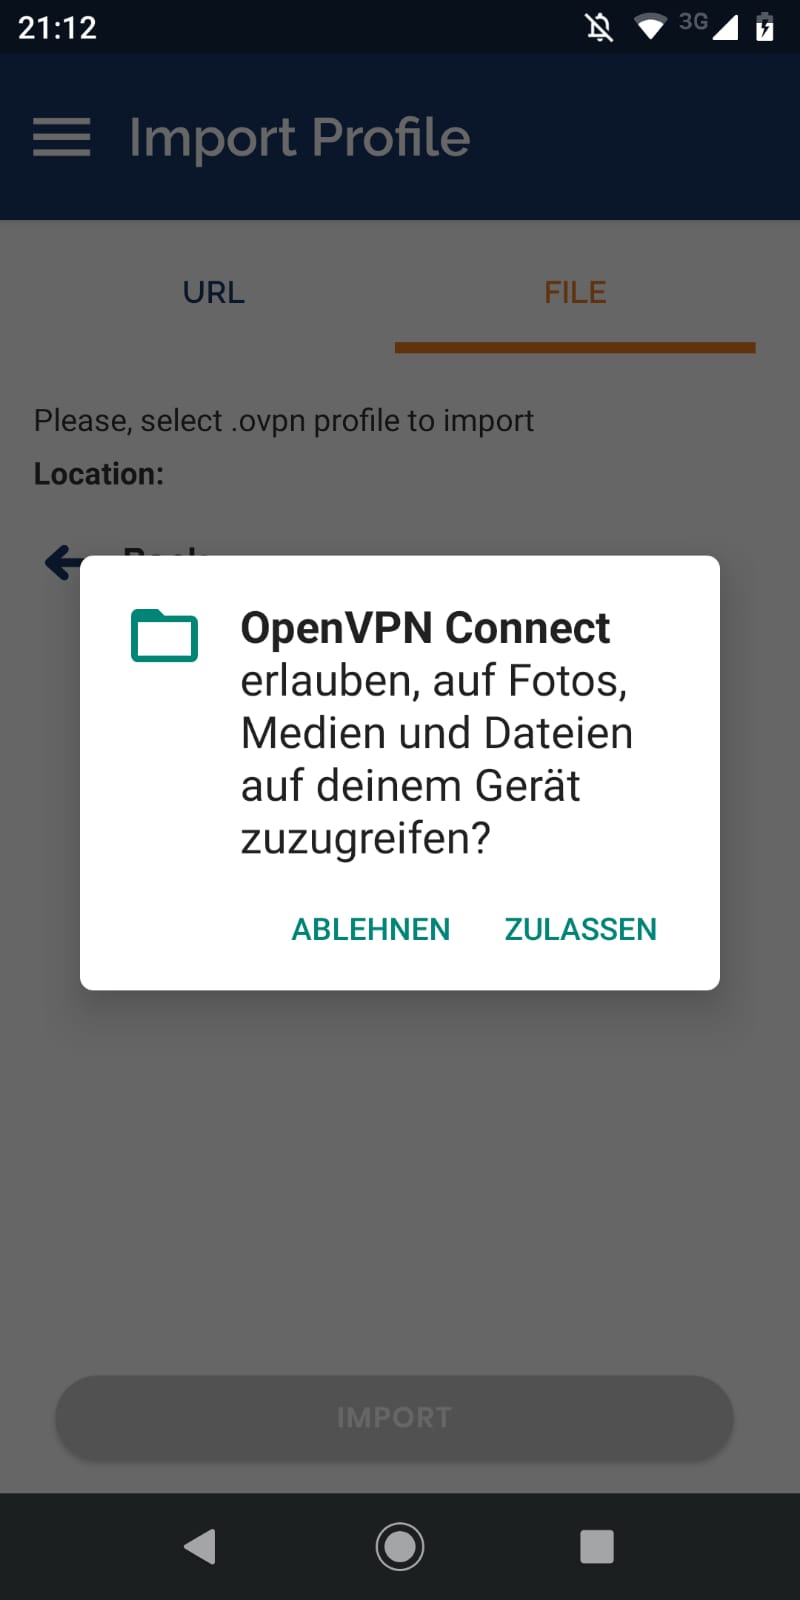
The app must be granted the necessary rights. Tap Accept.
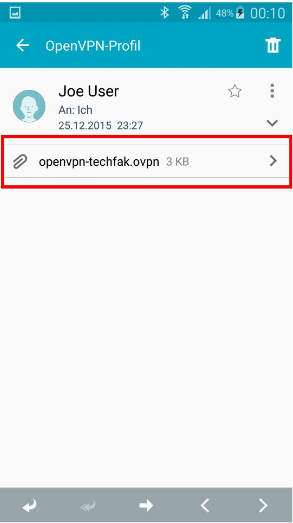
Download the OpenVPN profile and send it by email. Start the mail app and open the mail with the profile. Tap the attachment with the profile file.
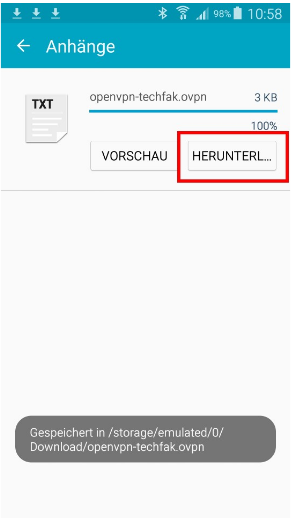
Tap “Download”. The profile is saved on the phone.
Open the OpenVPN Connect app.
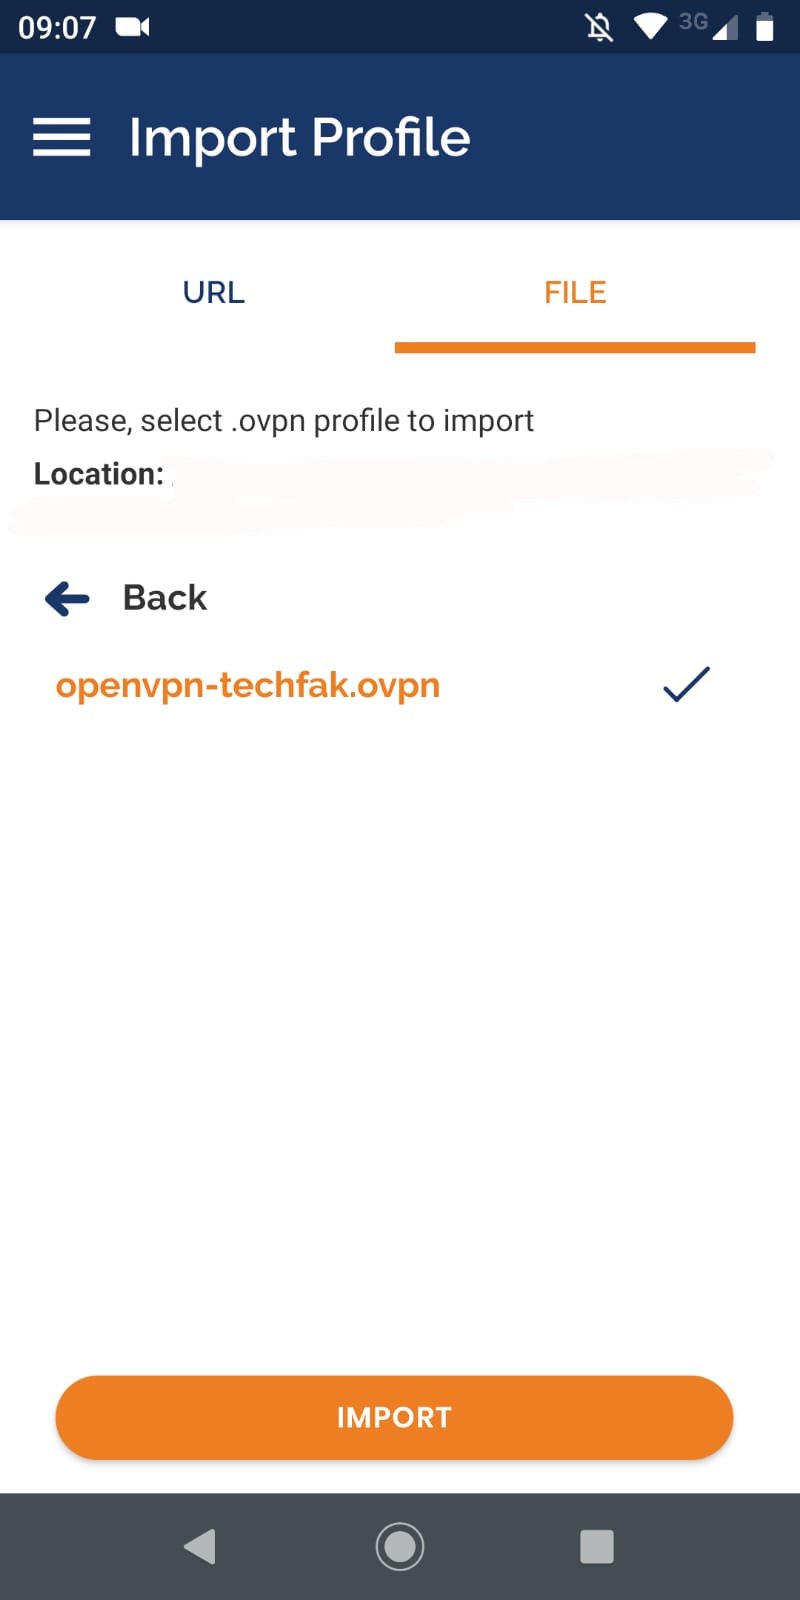
Click on the “File” tab and allow access to the media.
Choose the appropriate directory and select the file by tapping it.
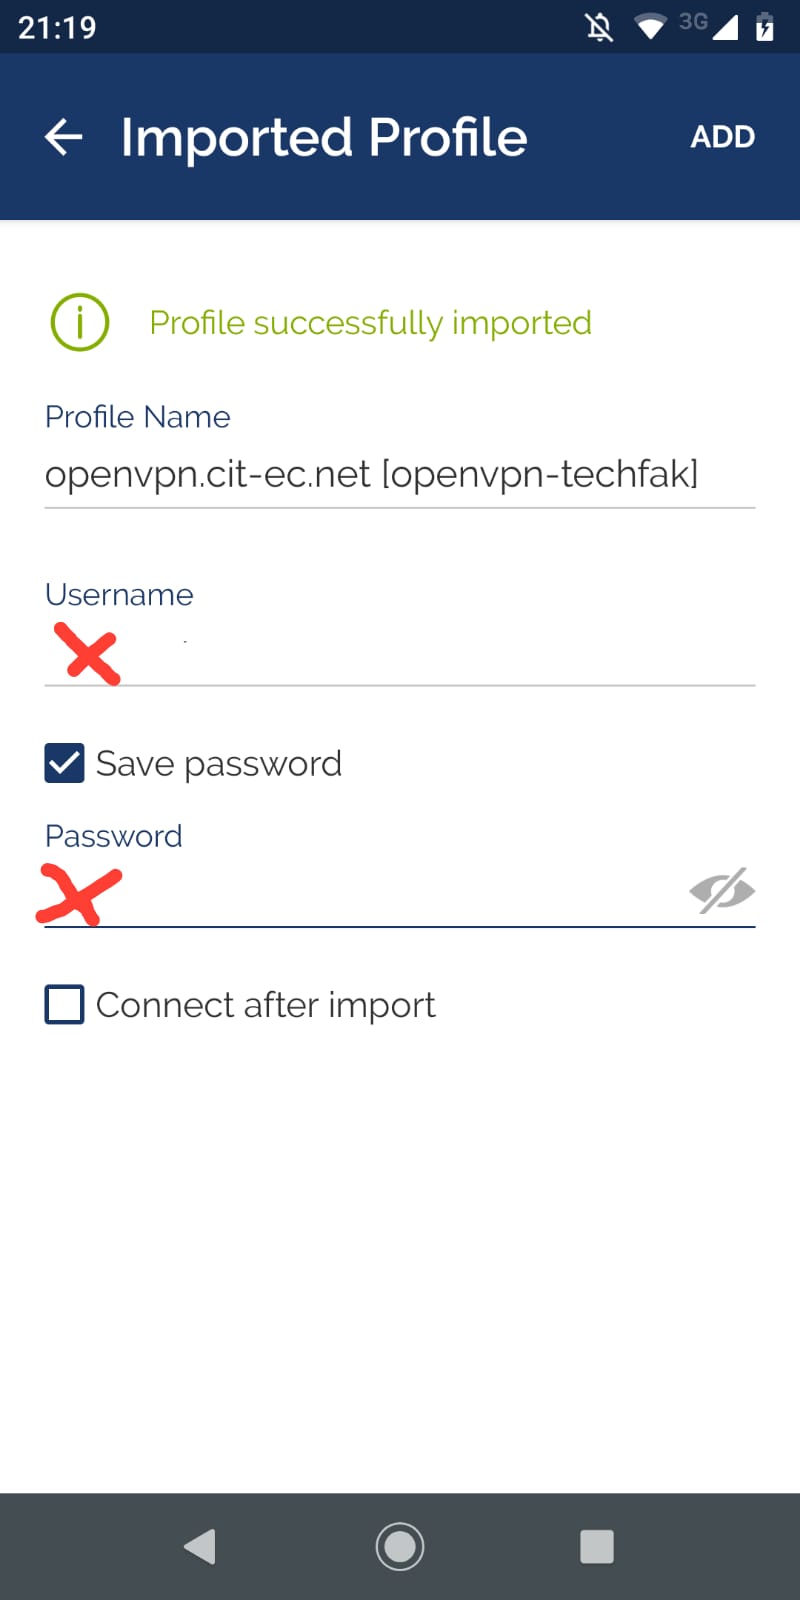
Specify the TechFak username, enter the TechFak network password and activate the “Save” option to save the username and password (Optional). Then click on Add.
Tap “Continue” so that the connection can be established.
“Connected” appears as soon as the VPN connection has been successfully established. The OpenVPN app can now be closed. The VPN connection continues to run in the background.

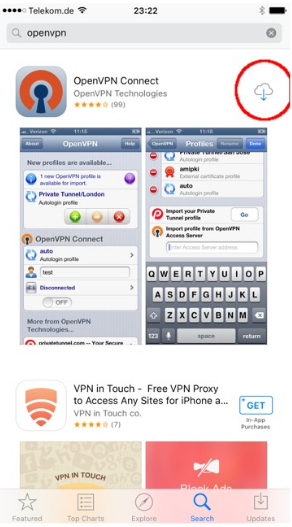
Download and install the “OpenVPN Connect” app from the app store. The app is free.
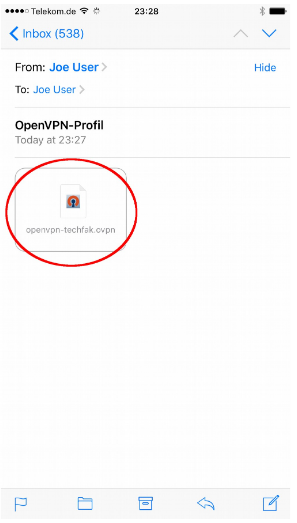
Download the OpenVPN profile and send it by email. Start the mail app and open the mail with the profile. Tap the attachment with the profile file.
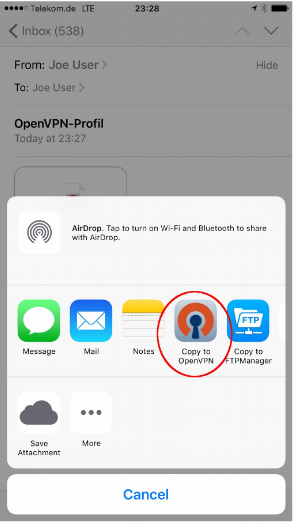
Select “Copy to OpenVPN”.
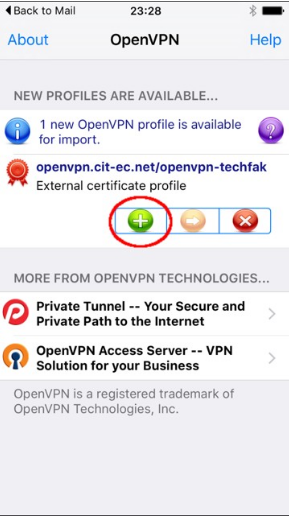
The OpenVPN app opens and the profile is loaded. Tap the green button with the plus sign.
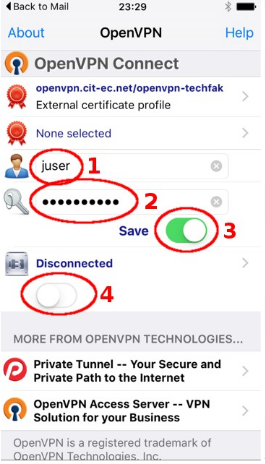
Enter the TechFak username (1), enter the TechFak network password (2), activate the “Save” switch (3) if the access data should be saved and activate the VPN connection with the switch below (4).
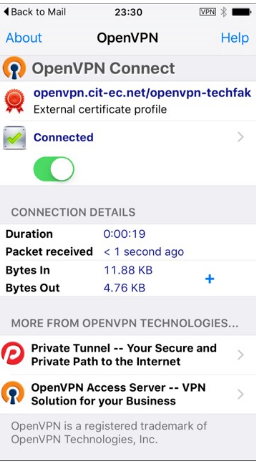
If the connection can be established successfully, “Connected” will appear. The OpenVPN app can now be closed. The VPN connection continues to run in the background.
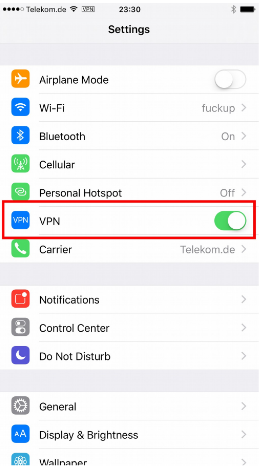
The VPN connection can also be enabled and disabled via the iOS Settings app.