Wired network access (LAN)
Access to the networks of the Faculty of Technology , CITEC and CoR-Lab is only possible after successful registration to the network.
We use the international standard IEEE-802.1x. If your client is not logged on to the network, you only have very limited access to internal services: You can only access the website of the computer operations group and the webmailer of the Faculty of Technology. All other access attempts will be blocked and you will be redirected to a notice page.
Configuration of the end devices
In order for a client to be able to log on to the network, in addition to access rights, software, a supplicant , is also required. Almost all current operating systems already include this in the standard installation, so it just needs to be configured.
Configuration
| Authentication: | EAP-TTLS (Tunneled TLS) oder PEAP |
| Anonymous (outer) Identity: | anonymous (or leave field blank) |
| Certified CAs: | Download |
| Inner authentication: | PAP or MSCHAP(v2) |
| Username: | Your TechFak username |
| Password: | The password assigned for network access |
Instructions
Under Gnome (Ubuntu, Fedora) the windows look slightly different, but the settings are identical.
First, download the Root certificate: citec-root-ca.crt. Alternatively, you can copy the file from another system. Save the file in a place where it can remain permanently, e.g. in ~/.cert/.
Alternatively, you can copy the file from another system. Save the file in a place where it can remain permanently
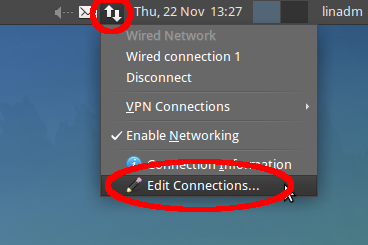
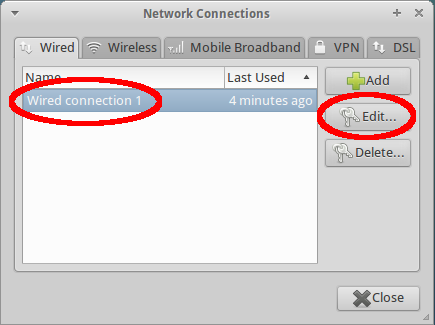
Select the wired network interface and click Edit.
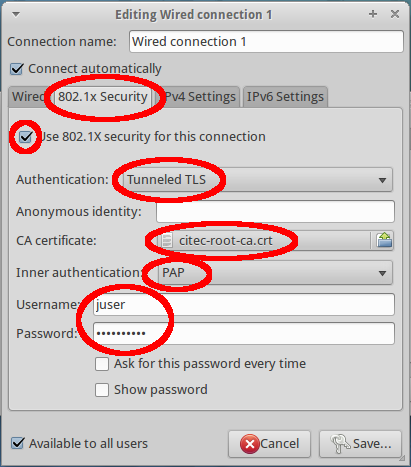
Select the "802.1x Security" tab and adjust the settings according to the screenshot. Under “CA Certificate” you select the storage location of the previously downloaded CA root certificate. “DHCP” must be set under “IPv4 Settings”. The password is your net password.
If a network profile, e.g. for eduroam, is already installed on the system, no manual settings can be made for networks. You can either delete the network profile in the settings or you must install another profile. We offer a profile with our settings on WLAN.
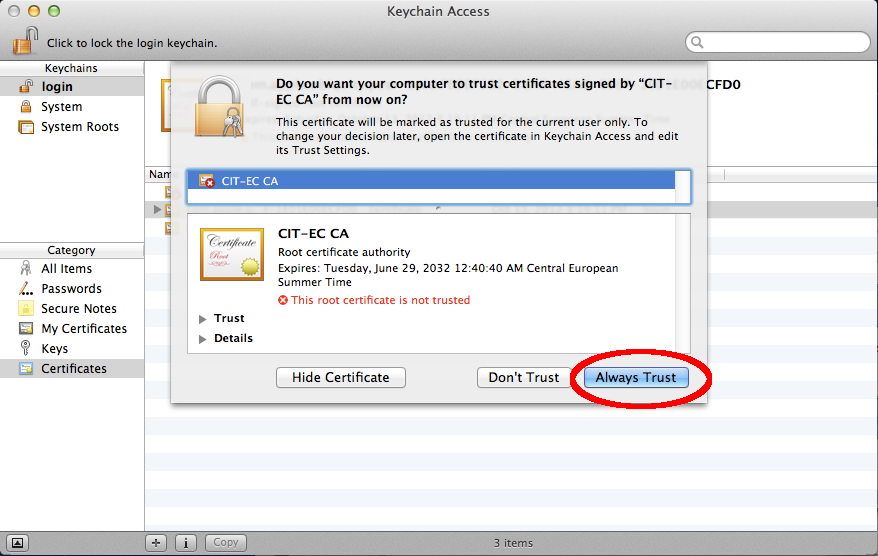
First you have to install the CITEC root certificate. To do this, download the citec-root-ca.crt or copy the file from another system. Double-click the file in OS X Finder. The “Keychain Access” opens (see screenshot). Click “Always Trust.”
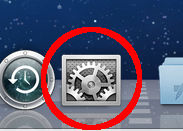
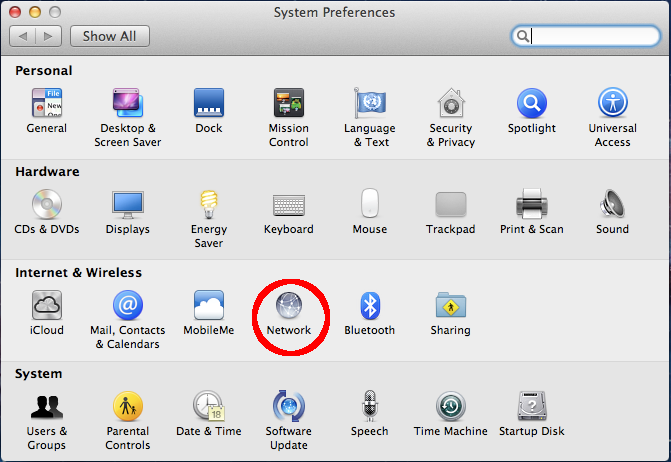
Open System Preferences. Then click on Network.
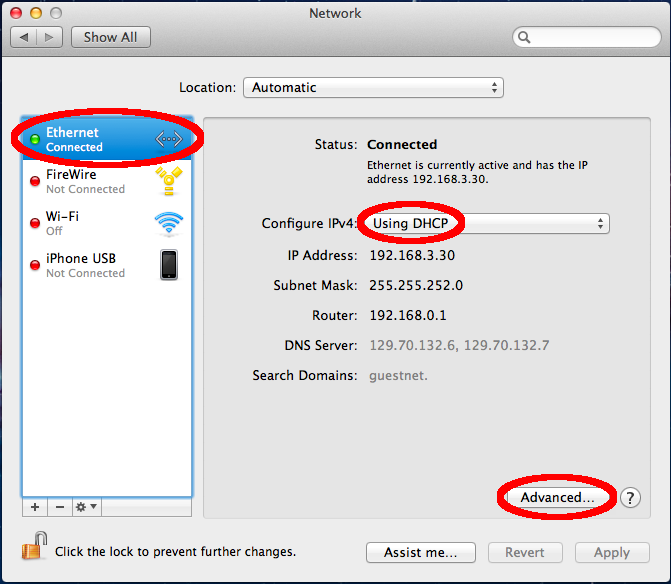
Make sure that the wired network interface “Ethernet” is selected in the left pane. Under “Configure IPv4,” select “DHCP” (if not already preset). Then click on “Advanced...".
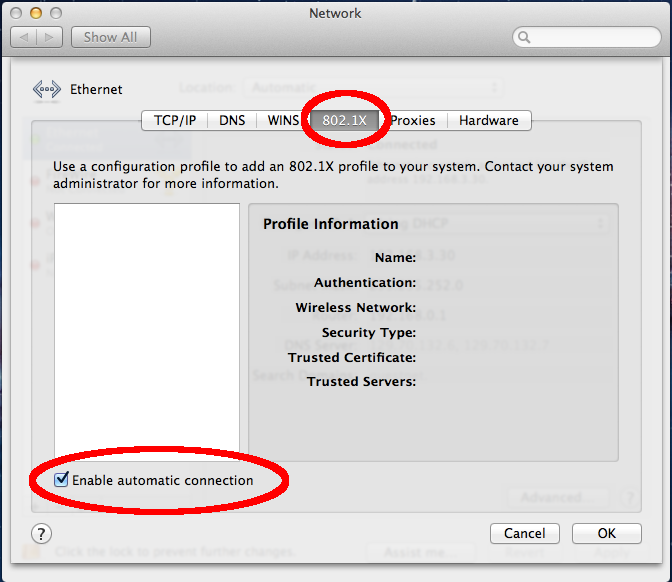
Click on the "802.1X" tab at the top and tick the "Enable automatic connection" box.
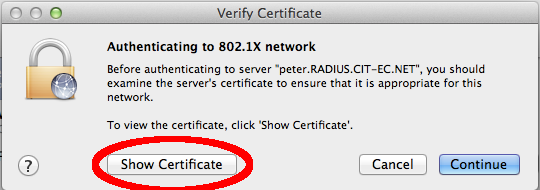
If the dialog shown here does not appear automatically, pull out the network cable and plug it back in. Select the "Show Certificate" button.
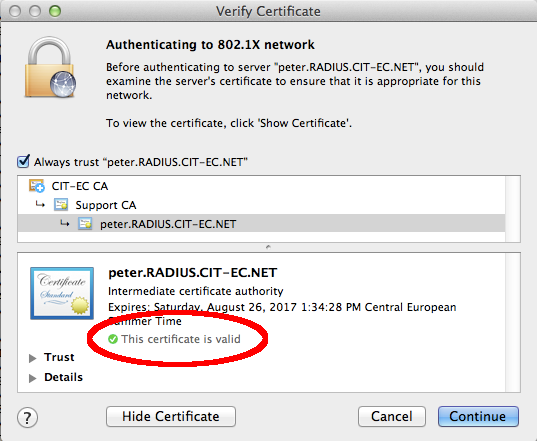
Make sure that the validity of the certificate has been recognized ("This certificate is valid"). If the certificate is valid, activate the “Always trust” selection. The server name shown in the screenshot may vary.
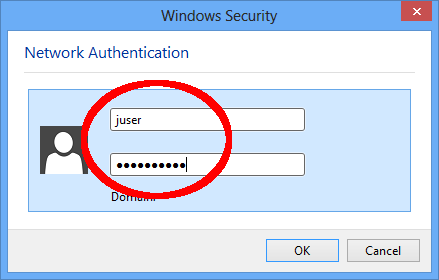
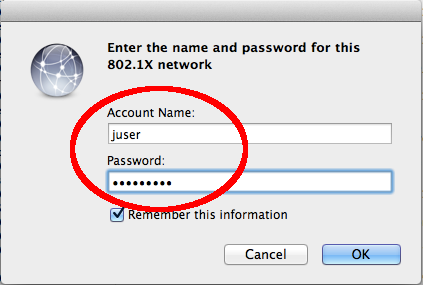
The next window appears and expects you to enter your login details. Enter your TechFak username and password for network access.
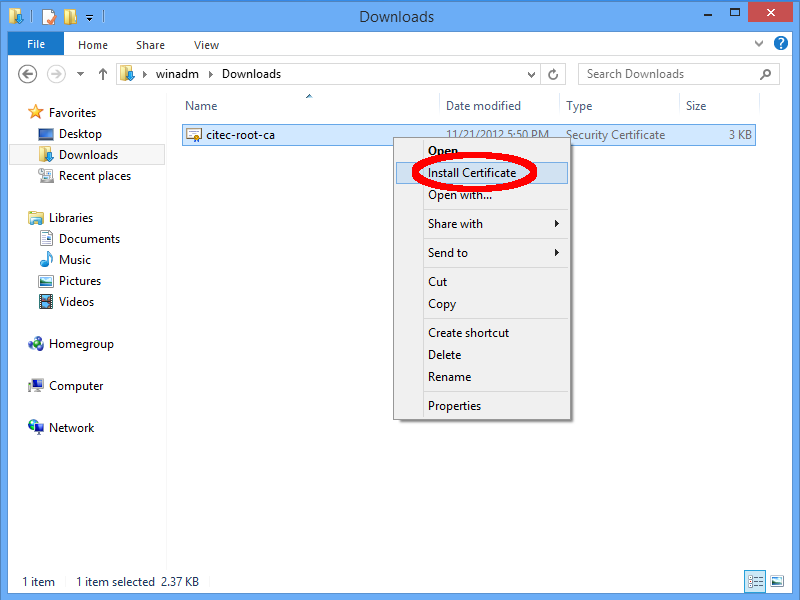
First you have to install the CITEC root certificate. To do this, download the citec-root-ca.crt or copy the file from another system. Right-click the file and select Install Certificate.
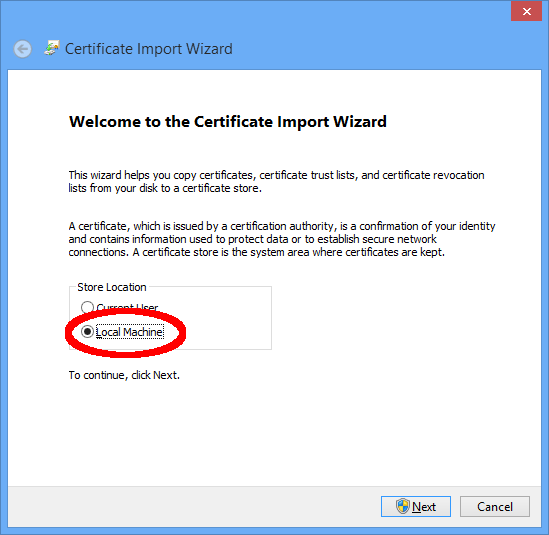
Select Local Machine as the certificate location.
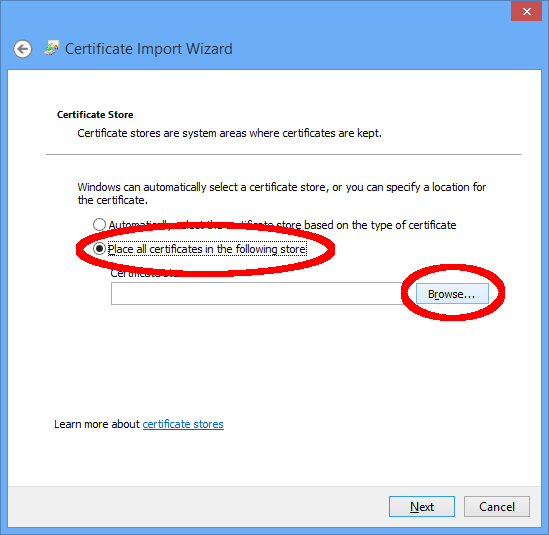
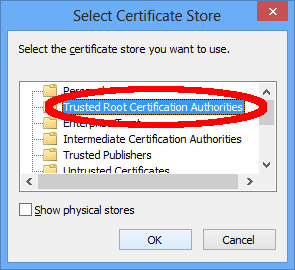
Select the certificate store manually. To do this, select the option “Place all certificates in the following store” and then click on “Browse”. Select "Trusted Root Certification Authorities" and complete the wizard by accepting the suggested settings in the next steps.
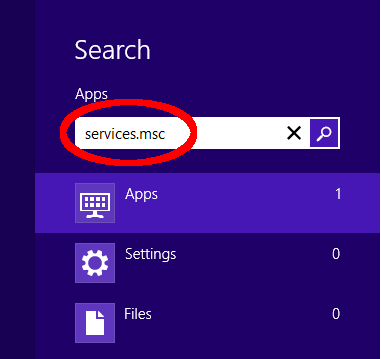
Open the Windows start screen, enter "services.msc" in the search field and press the Return or Enter key.
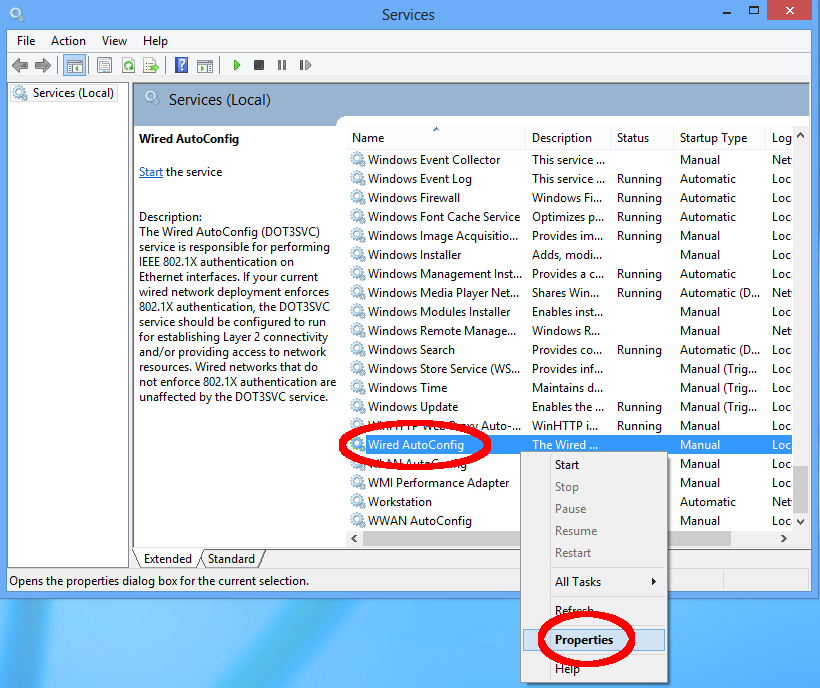
Find the “Wired AutoConfig” service and configure it by clicking Properties in the context menu (use the right mouse button).
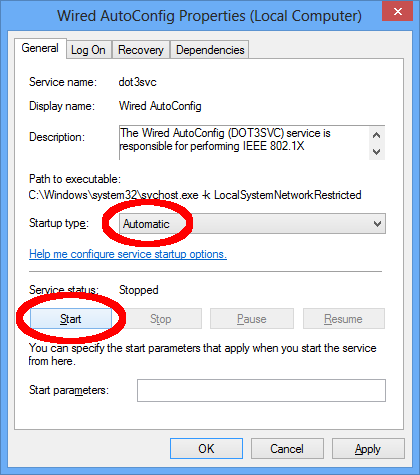
Select "Automatic" from the drop-down menu, then click "Start."
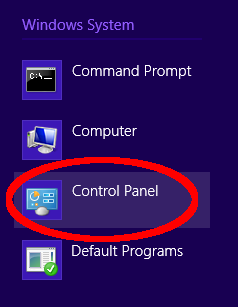
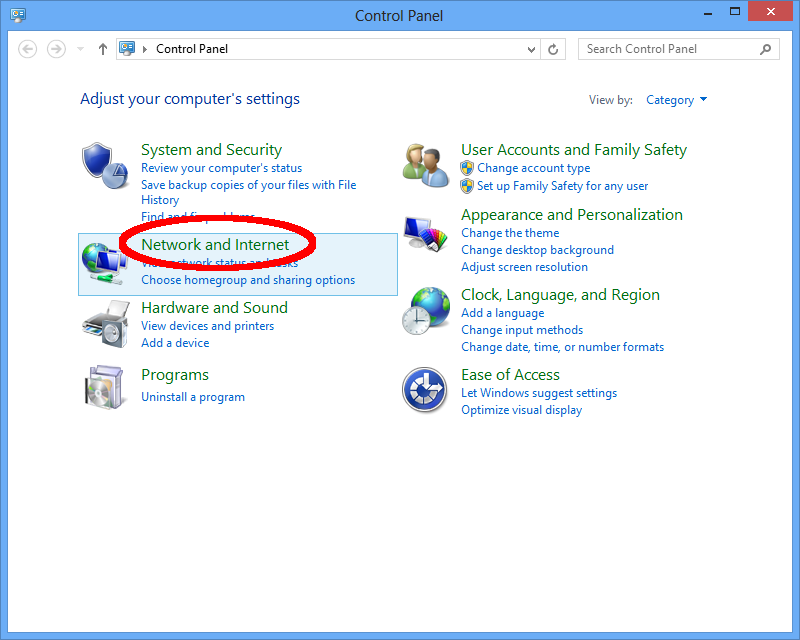
Open Control Panel and click Network and Internet
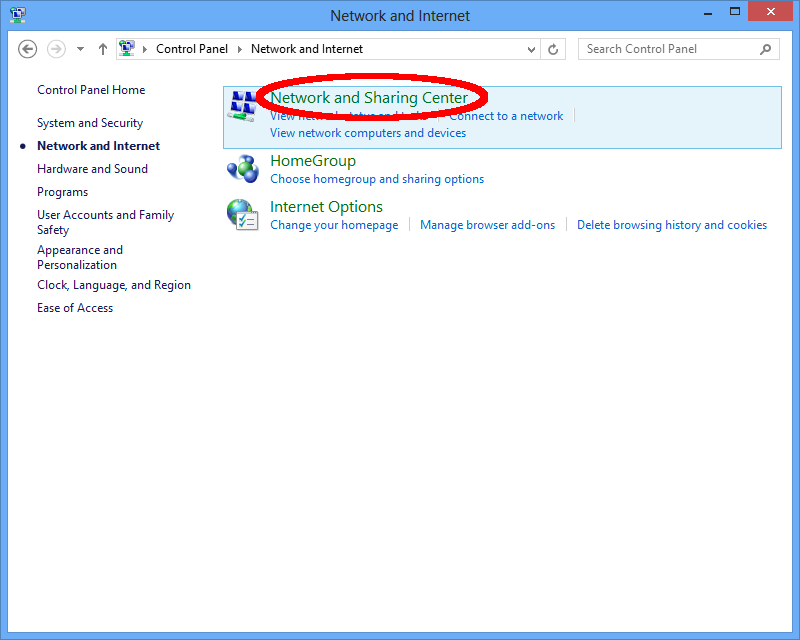
Click "Network and Sharing Center."
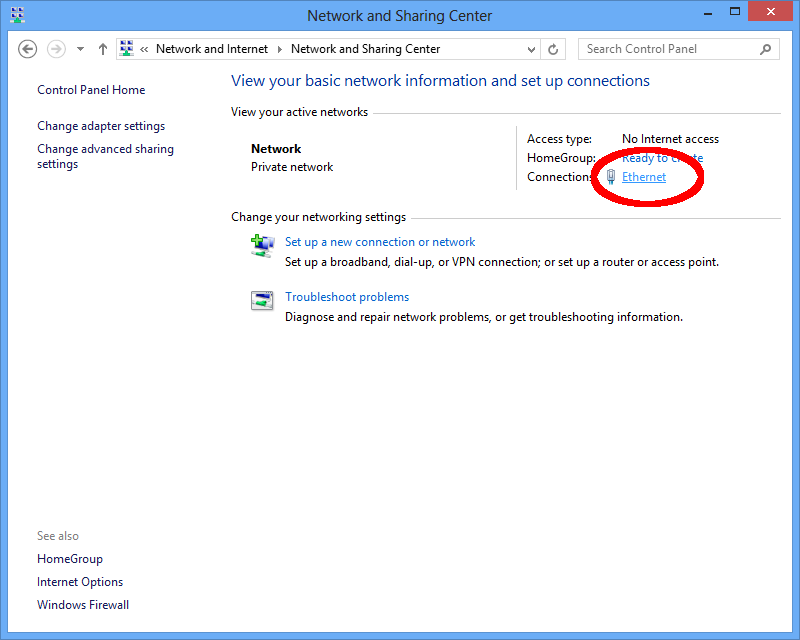
Click on "Ethernet".
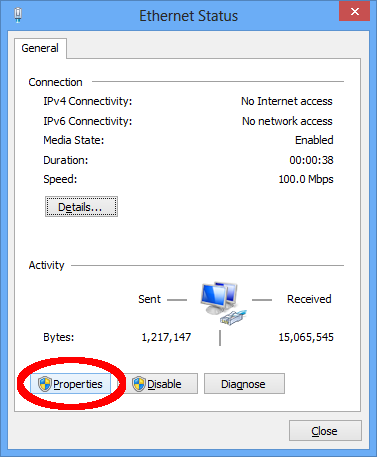
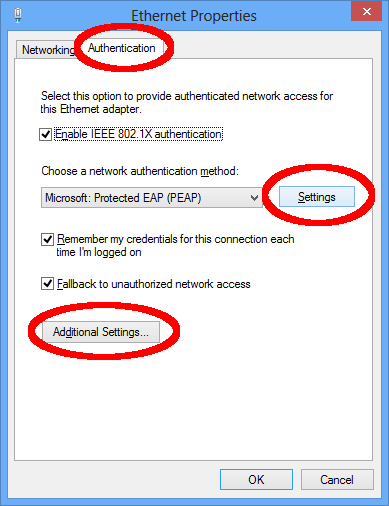
Open the properties of the LAN connection using the "Properties" button. In the connection properties window, select the “Authentication” tab and click “Settings”.
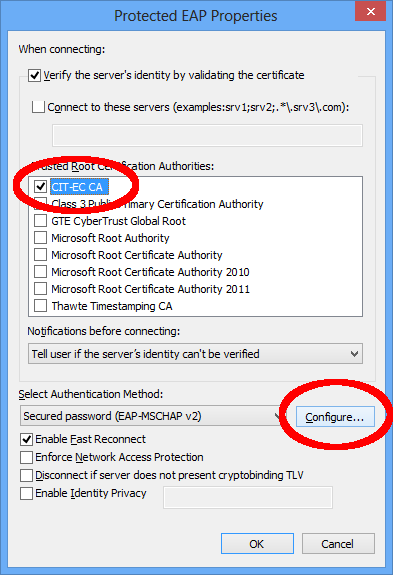
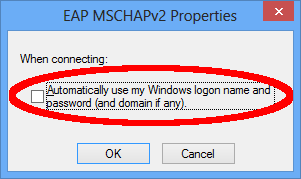
Make sure only "CIT-EC CA" is selected and click the "Configure..." button. Deactivate the checkbox so that Windows does not use your login data to log into the network. To log in to the network, you must use your TechFak username and the net password!
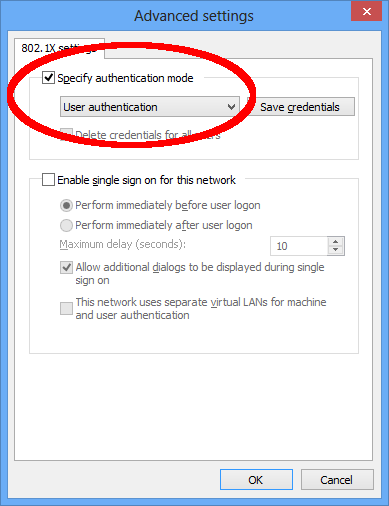
Close both windows and return to the LAN connection properties. From there, click on the “Additional Settings” button. Select the "Specify authentication mode" option and the "User authentication" value from the drop-down list.
A window is opening. Enter your login details now. Enter your TechFak username and password for network access.